系统版本 : macOS Ventura
设备信息: MacBook Air M1(AppleSilicon)
Anaconda
下载 miniforge3,下载地址为:链接🔗
在Download中选择 Apple Silicon 版本:arm64 (Apple Silicon)将下载好的脚本移动到用户目录,并赋予执行权限,安装即可。
安装
下载完以后在terminal依次输入以下三个命令,后面的命令也都是在terminal输入
chmod +x ~/Downloads/Miniforge3-MacOSX-arm64.sh
sh ~/Downloads/Miniforge3-MacOSX-arm64.sh
source ~/miniforge3/bin/activate
查看版本
conda --version
python --version
创建环境,指定为python3.9
env_name是环境名字
conda create -n env_name python==3.9
激活环境
conda activate env_name
安装jupyter
conda install jupyter notebook
使用jupyter
jupyter notebook
Tensorflow
打开终端,在conda环境中,默认安装2.8版本的tensorflow,也可以指定版本。最好默认
conda install -c apple tensorflow-deps
python -m pip install tensorflow-macos
python -m pip install tensorflow-metal
PyCharm
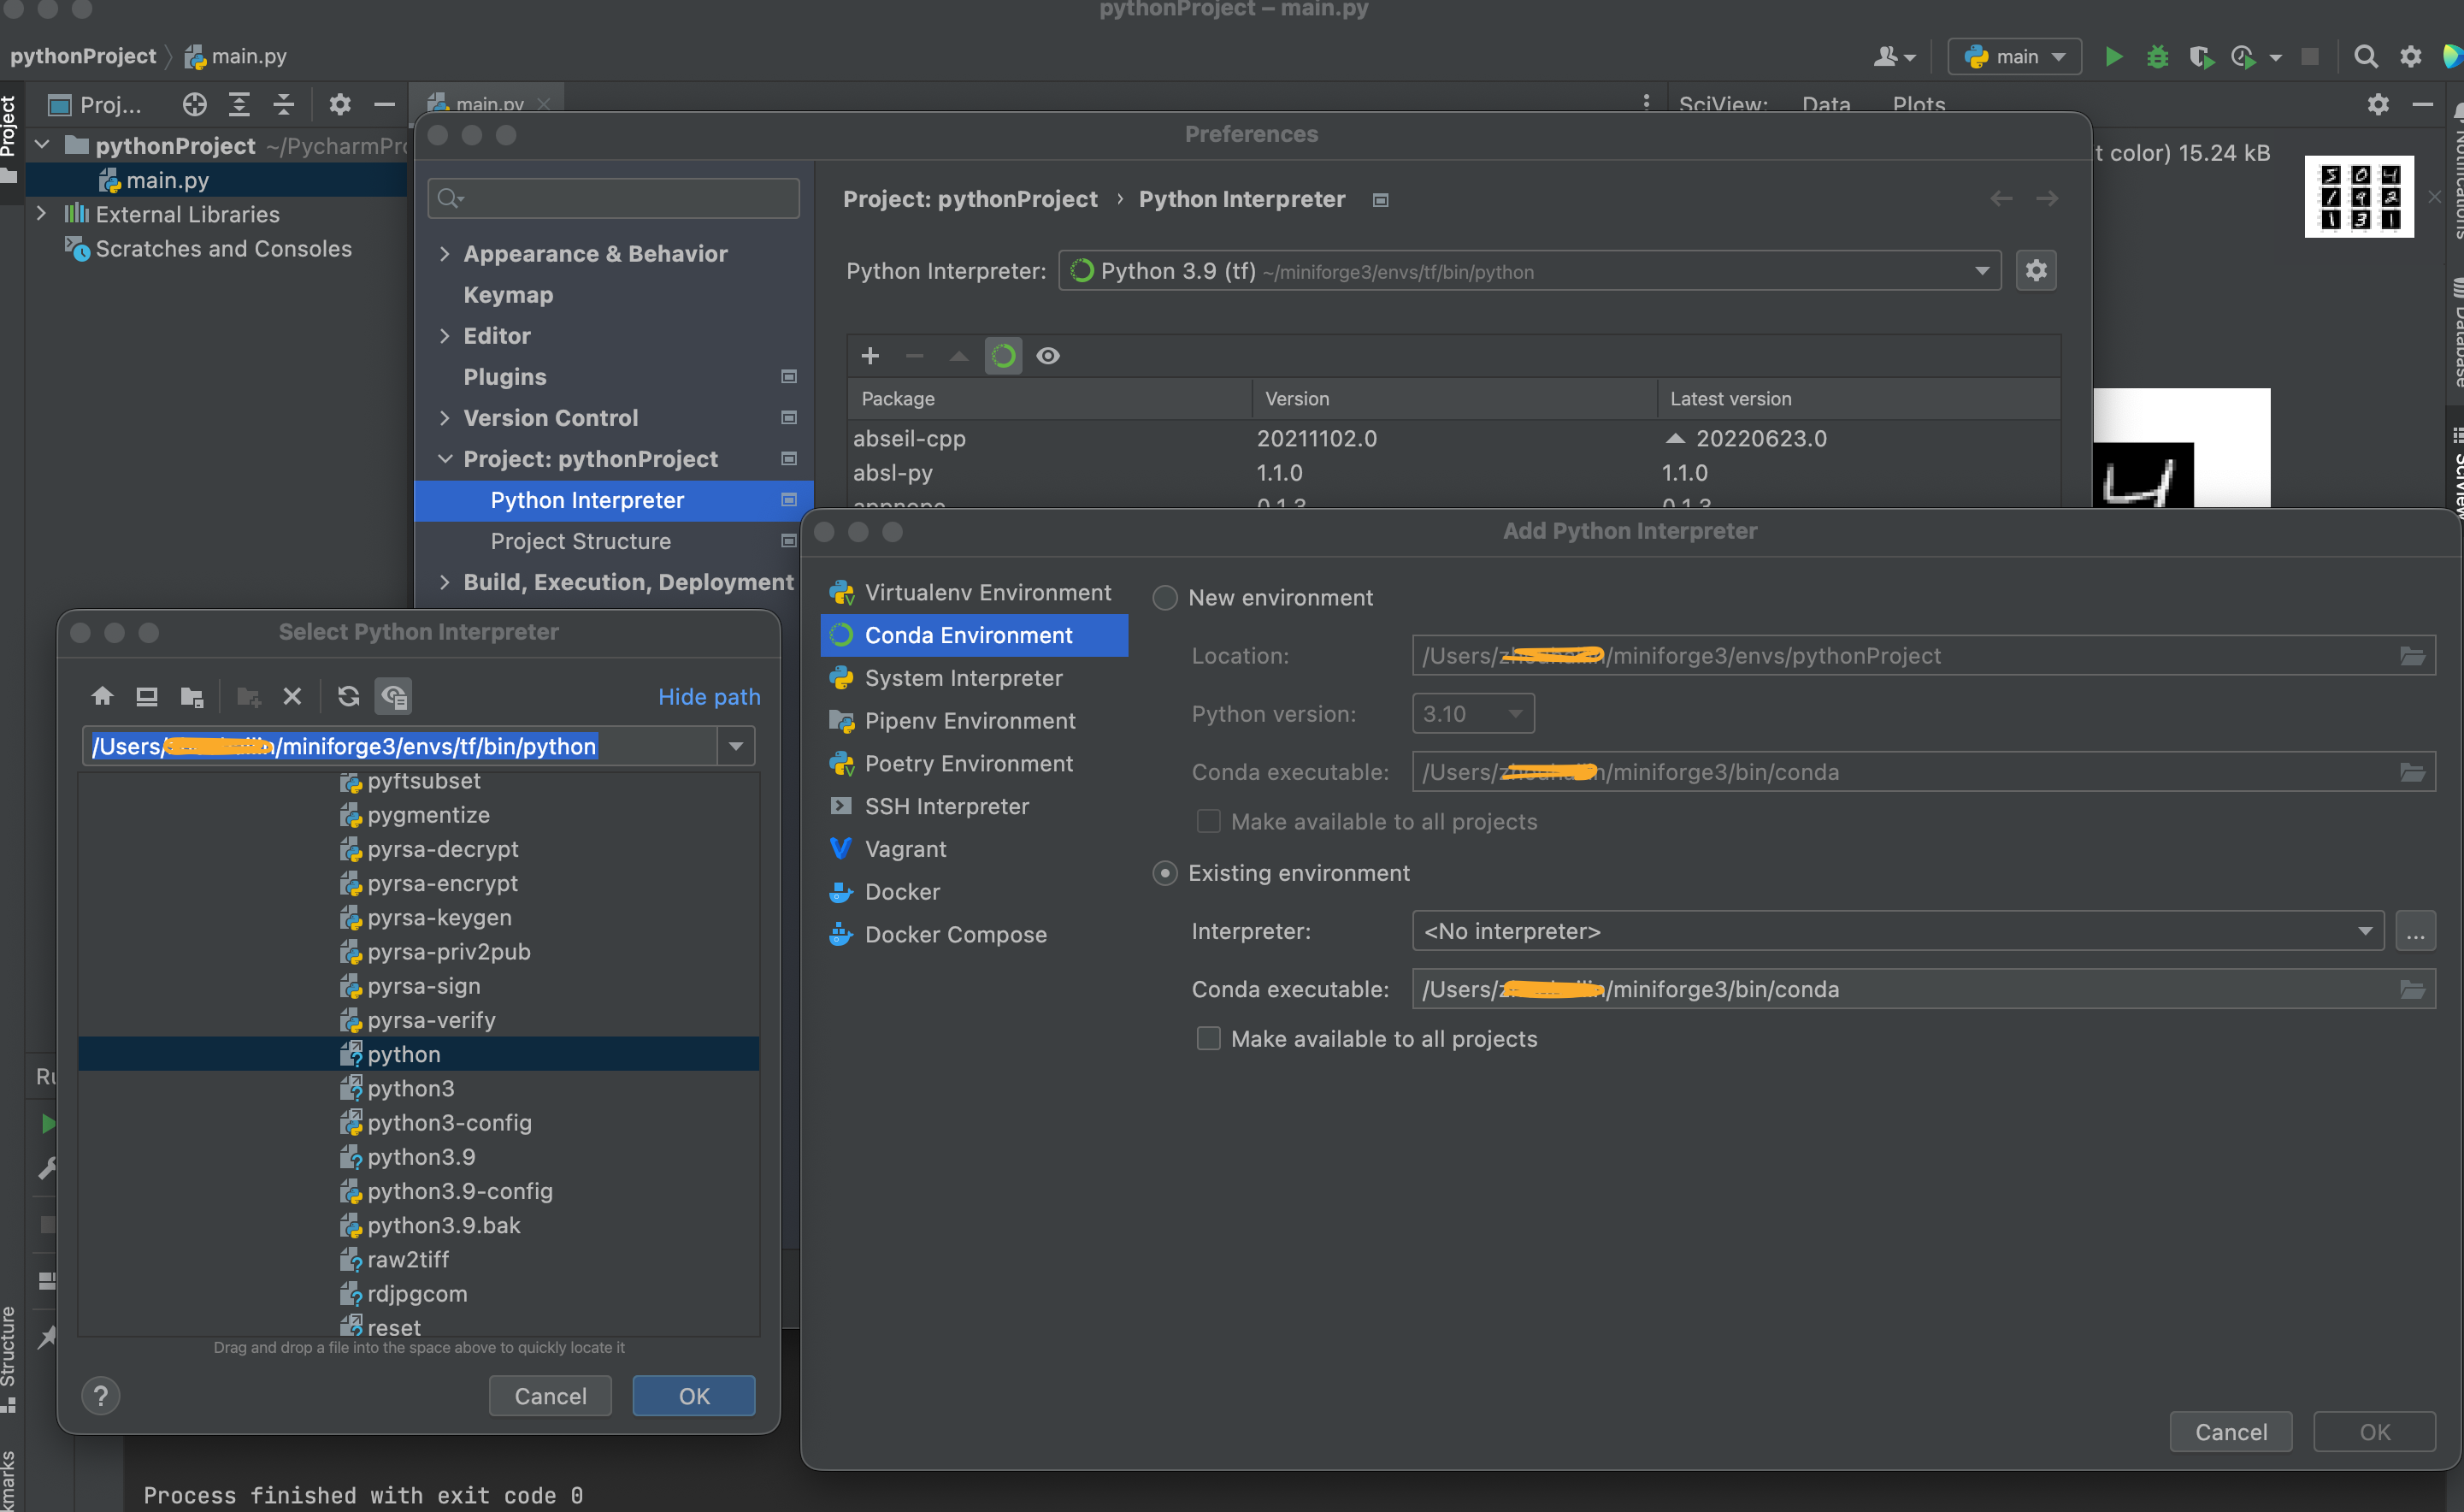
将虚拟环境设置到IDE便于管理切换操作路径为Preferences -> Project -> Python Interpreter 点击设计图标 选择 Add -> Conda Environment 涂鸦部分为电脑用户名。
查看tensorflow版本
import tensorflow as tf

def print_hi(name):
    # Use a breakpoint in the code line below to debug your script.
    print(f'Hi, {name}')  # Press ⌘F8 to toggle the breakpoint.

# Press the green button in the gutter to run the script.
if __name__ == '__main__':
    print_hi('PyCharm')
    # 查看tensorflow版本
    print('tensorflow Version :'+tf.__version__)


